Think about how much time you could save if you eliminated repetitive tasks from your busy schedule?
Imagine spreadsheets filling in on their own or creating shipping labels while you sleep. You can eliminate these repetitive tasks and more with Zapier! Use this online automation tool to connect your Ecwid store with other apps and services.
We’ve recently updated our integration with Zapier, and now you have more tools to make your workflow more convenient. Here are a few ways:
- Get a new WhatsApp message for new orders
- Send an invoice to QuickBooks or other accounting software when a customer makes a purchase
- Tweet about your new product the moment you create it in your store.
Best of all, you can do it yourself, without coding or relying on developers to build the integration.
You can work smarter, not harder. Let’s find out how.
What Is Zapier?
Zapier is an apps and services connector that allows you to automate daily tasks that involve using Ecwid and 2,000+ applications. Using Zapier, you can create your own integrations with different systems. For example, you can connect your Ecwid store to QuickBooks, Gmail, Twitter, Hubspot, Telegram, Whatsapp, Zendesk, Intercom, and more.
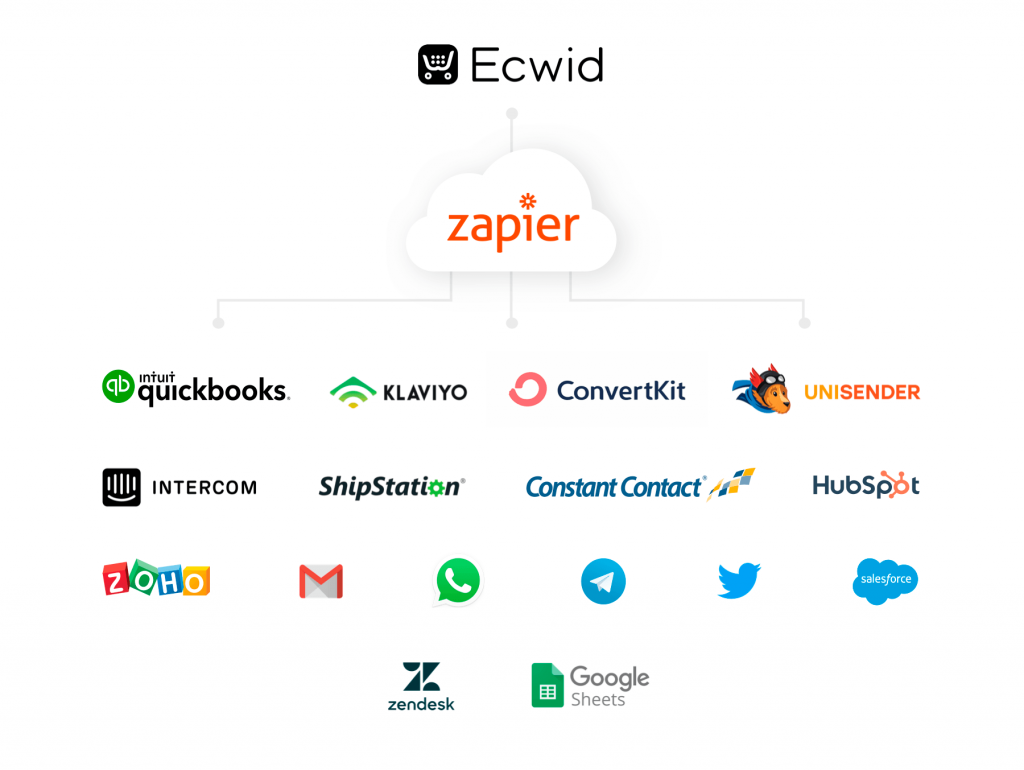
Need to automatically add new Ecwid orders to a spreadsheet? Sync customers’ emails with a newsletter service? Or, pin new products to a board on Pinterest as you add them to Ecwid store? With Zapier, you can set it and forget it.
You may think that connecting one service with another sounds like a job for a

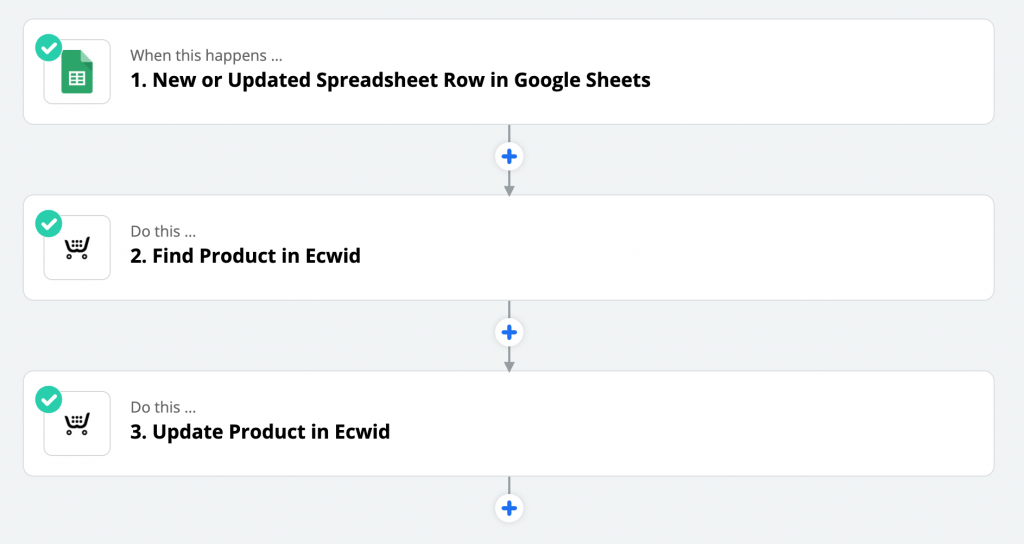
What you see in the picture above is creating a Zap: you set up one event as a trigger and another one as an action. When a trigger happens, it causes an action.
For example, you want to receive an SMS every time you get a new order in your store. In this case, a “trigger” that you set up in Zapier is a new order placed in your store, and the resulting “action” is notifying you via an SMS.
You can create your own Zaps or choose from online templates that have been created and shared by other Zapier users — including integrations with Ecwid.
We also added some popular integrations made with Zapier to our App Market — less work for you! Here are just a few examples of how you can use them:
- Create an order in ShipStation when an online order needs to be shipped
- Send an invoice to QuickBooks when a customer makes a purchase
- Set tags add automatically in Zoho CRM when there is a new order in your store
- Create a new contact in HubSpot, Salesforce, Klaviyo, ConvertKit, or Constant Contact when a new customer places an order
- Add new customers to a subscriber list in UniSender
- Create a new user in Intercom when there’s a new customer in your store
- Create a new contact in Zendesk when a new customer places an order
- Update product stock in your Ecwid store when you manage stock in Google Sheets.
You can also set up workflows that are very specific to your business. Want to get an SMS notification only when a certain product is purchased? You can set up a filter to your Zap and it will run only when this condition is met.
Or, you can create Zaps that run different actions based on different conditions. Say, you sell coffee beans online all over the country and you also offer coffee takeout in your city. You can set up an advanced Zap to prepare pickup orders faster. If there’s a new pickup order in your store, you get an SMS. But if a new order is to be shipped to another state, a shipping label is created automatically for this order.
Examples of Using Zapier for Your Ecwid Store
Below are just a couple of ways to use Zapier for your Ecwid store. Explore the service and create your own Zaps — there are more than 2,000 different apps at your disposal! Task management and calendar apps, accounting software, communication apps, analytics services, marketing automation apps, and more.
Better manage your tasks
A small business owner has a long

Make shipping process easier
When a new order is placed in your Ecwid store, you can automatically add the order to your Easyship account (or other shipping software) so that you can create shipping labels faster.
Save time on accounting
You can connect Ecwid and an accounting software of your choice, so that when a new order is placed in your store, a new invoice is created in your accounting platform. For example, you can link your store to Zoho CRM, Quickbooks, Salesforce, or dozens of similar apps.
Invite customers to your online events
Do you sell online courses or regularly run webinars? Connect your Ecwid store to a webinar platform of your choice. Zapier will automatically invite your customers to your online event.

Read our article about selling online courses for a
Grow your email list
Ecwid is already integrated with one of the most popular email marketing services, Mailchimp. But if you use some other newsletter service, you can link it to your store with Zapier to keep your mailing list constantly updated. Zapier will automatically add a new subscriber to the email marketing service you use whenever a new customer is added on Ecwid.
Manage your product stock
You can manage product stock in your Ecwid store right from your spreadsheet. Say, you have a spreadsheet with all your items and product information like SKU and stock availability. When you change the number of
How to Сonnect Ecwid to Tools with Zapier
Ecwid is integrated with lots of services but if you didn’t find the one you need in your Control Panel or App Market, think about Zapier. Given that it’s integrated with 2,000+ apps, you’re highly likely to find a solution for your store.
To connect services of your choice to your Ecwid store, go to Ecwid App Market and install the Zapier app. Access to the App Market is available on all Ecwid premium pricing plans. Your Zapier account can be on any pricing plan.
Which Ecwid data can be used when creating a Zap
As we’ve recently updated our Zapier integration, now you have more options for creating workflows that involve using your store.
Here’s what you can set as triggers, or events in your Ecwid store that signal the integrated service to perform a certain action:
- New Customer
- New Product
- New Paid Order
- New Shipping Order
- New Order
- New Abandoned Cart
- New Pickup Order
Here’s what you can set as actions, or events in your Ecwid store that are initiated by a certain trigger in the integrated service:
- Create Customer
- Create Product
- Update Product
- Create Discount Coupon
- Create Order
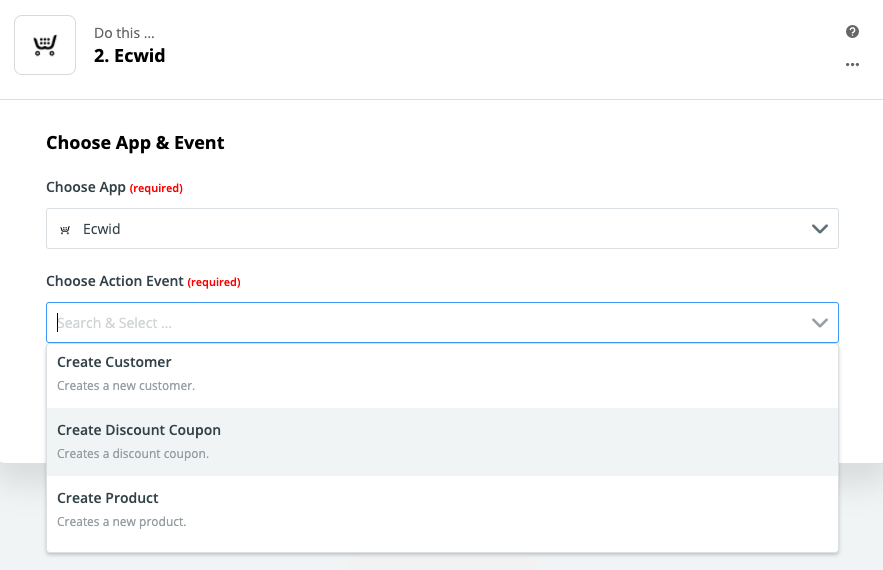
Choosing an action in Ecwid that is to be initiated by a trigger
There are also searches. Search steps find info in an app so you can use it later in the same Zap. Here are Ecwid searches Zapier supports:
- Find Customer
- Find Product
- Find or Create Product
- Find Order
- Find or Create Customer
How to create a Zap
After you install the Zapier app, you can proceed to create your first workflow. The process is always the same no matter which apps you decide to connect:
- Authenticate the apps you want to link (in most cases you just sign in to your accounts).
- Pick one of the apps as a trigger.
- Choose a resulting action from the other app.
- Select the data you want to send from one app to the other.
Now let’s break down creating a Zap using the example of linking Ecwid and Google Sheets.
To save Ecwid orders to Google Sheets:
- Go to your Ecwid Control Panel → Apps → My apps, find Zapier and click “Open app.”
- In a new window, click “Make a Zap.”
- Give a name to your Zap. In this case, it can be “Save Ecwid orders to Google Sheets.”
- Find “1. When this happens …” field, search for Ecwid and select it in “Choose App”.
- In “Choose Trigger Event” state the trigger — “New Order.” Click “Continue”:
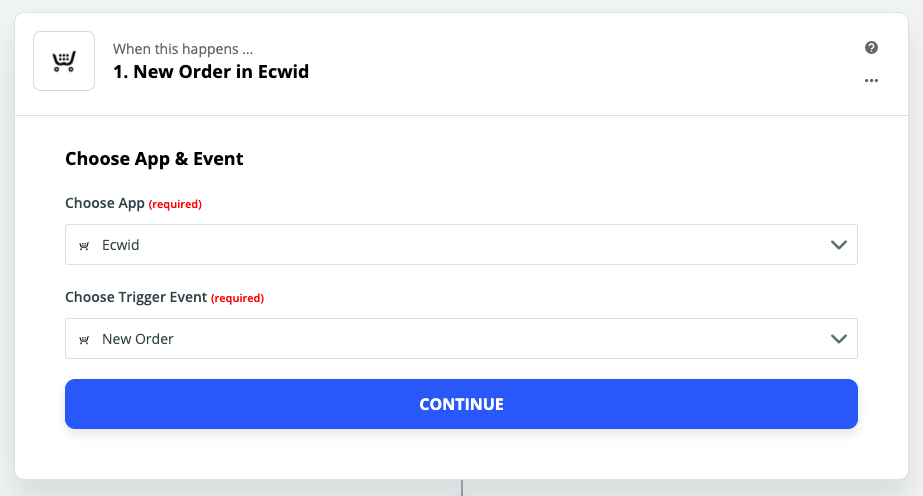
- Choose your Ecwid account and click “Continue.” You’ll be able to test your trigger to confirm the right account is connected and your trigger is set up correctly.
- Scroll to “2. Do this …” and in “Choose App” select Google Sheets.
- In “Choose Action Event” select the action — “Create Spreadsheet Row.” Click “Continue”:
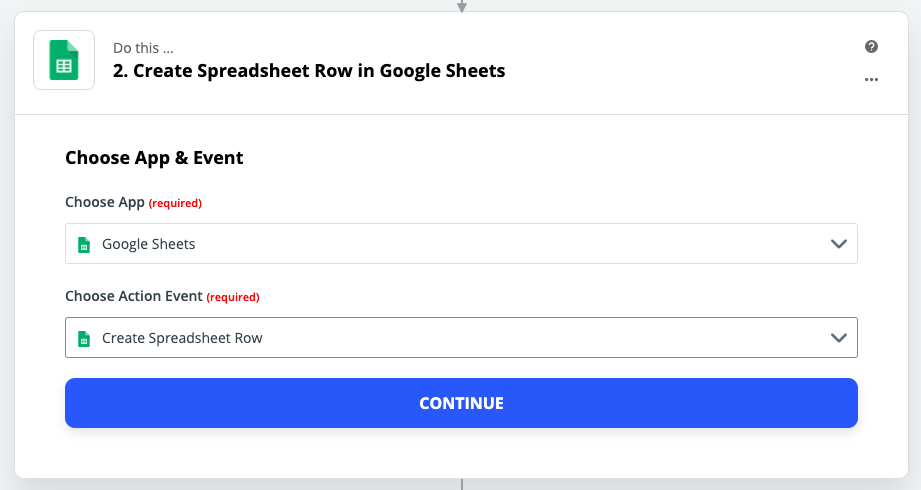
- Click “Sign in to Google Sheets.” Choose your Google account and allow Zapier to access it. Click “Continue.”
- Fill in the required fields: choose the Drive, Spreadsheet, and Worksheet you want your Ecwid orders to save to. Also, make sure you get your sheet ready to work with Zapier.
- Choose which order data you want to save to the spreadsheet. For example, order number, payment status, a customer’s email, etc. (Don’t forget to create corresponding columns in your spreadsheet first.) Click “Continue”:
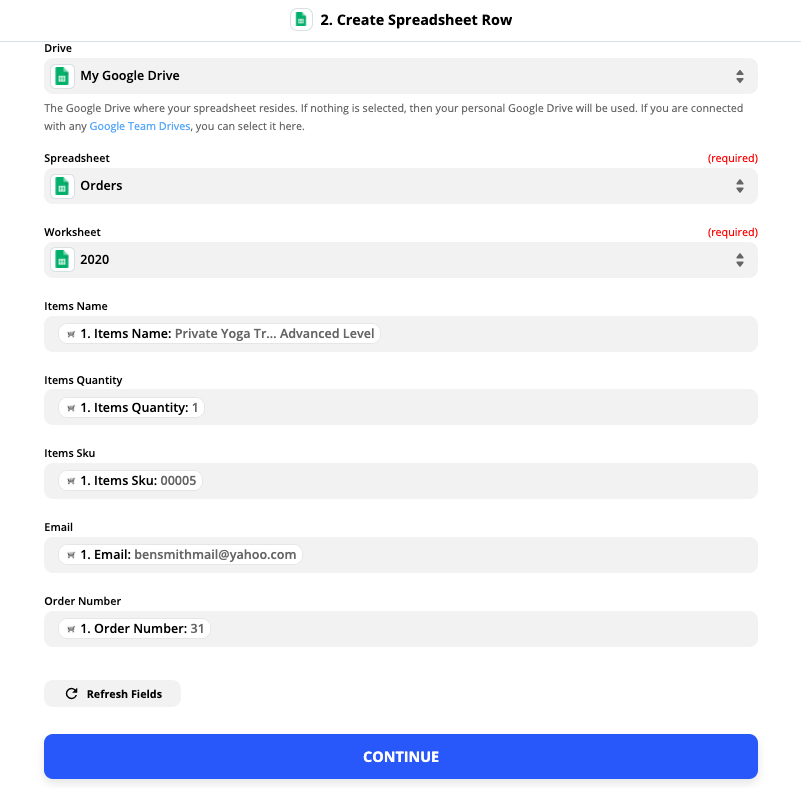
- Click “Test & Continue” to check that your zap works right.
- Click “Done editing” and turn on your zap.
That’s it! You just saved yourself hours of work.
Automate Your Daily Tasks
Now you know how to connect Ecwid with other apps without any coding to save more time every day. Still hesitant if you should automate your tasks? Try a litmus test suggested by Will Christensen, an automation expert:
“Write down things that you’re doing more than once and then track how long it took you to do that thing. If it is happening more than 15 minutes a day, it’s time for you to consider automating it.”
Want to know more about using Zapier for your business? Listen to our podcast with Will Christensen on
If you’re using Zapier already head to the comments section below and tell us about the Zaps you created for your store. Fellow Ecwid merchants will appreciate your tips!


